Connecting A-D converters
On modern Macs, which have USB ports, you need a USB --> serial converter. I've verified that the Keyspan (now, TrippLite) USA-19HS works nicely. I've also verified that other converters DO NOT work reliably, so I highly recommend the Keyspan/Tripp Lite units. Make sure the driver software is appropriate for whatever version of OS X you have.
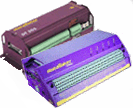
 Sable Systems Universal Interface 'UI2':
Connecting the UI2 is simple. With your USB-serial converter installed (with the necessary driver software), you should not have to do anything except plug in the cable that comes with the UI2.
PLEASE NOTE: the new UI3 (with a USB connection) is not supported by LabHelper X.
 Data Electronics DataTaker: Data Electronics DataTaker:
These instructions refer to the basic DT500 and DT800
models. Earlier models may not work, and I have not had the opportunity to test other versions personally. However, users have told me that other DataTaker models do work with the software.
- The software expects the default factory settings (no parity, 8 data bits, 1 stop bit). For the DT500, the standard baud rate is 4800. For the DT800, a faster rate will be automatically used, up to 115,000 baud (if necessary, the maximum rate can be adjusted from within the LabHelper A-D menu). If you want
to use other baud rates on the DT500, set the appropriate DataTaker switches for the desired
rate. Make sure to use no parity, 8 data bits, and 1 stop bit (If
these settings are incorrect, the software won't work).
- Build (or purchase) a connecting cable and power supply, as outlined
in the very detailed and helpful DataTaker instruction manual.
- DataTakers come with screw terminals or (DT800) 'cage clamp' terminals to which you can directly attach
instrument recorder cables. However, you may want to build your own
junction box with connectors that are easier to use -- especially if you change instrument inputs frequently.
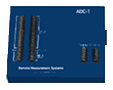 Remote Measurement Systems ADC-1:
NOTE: the ADC-1 is no longer being manufactured, but used ones can be obtained and work fine for many purposes.
If possible, get an ADC-1 with the normal
input voltage range (±0.42 volts) and the 50X programmable
gain option on all 16 channels. You can use an ADC-1 with the
gain option on only 8 channels if you are careful to attach your instruments
to those channels exclusively. You can even use an ADC-1 without
programmable gain, but resolution will be much more limited.
- Set the DIP switches on the back of the ADC-1 to 9600 baud (you can
use slower baud rates, but the default is 9600), no parity, 8 data bits,
1 stop bit. If these settings are incorrect, the LabHelper software
won't work.
- Build a connecting cable and power supply, as outlined in the very
detailed and helpful ADC-1 instruction manual.
- The ADC-1 comes with screw terminals to which you can directly attach
instrument recorder cables. However, you may want to build your own
junction box with connectors that are easier to use.
|
 Warthog Systems LabHelper X