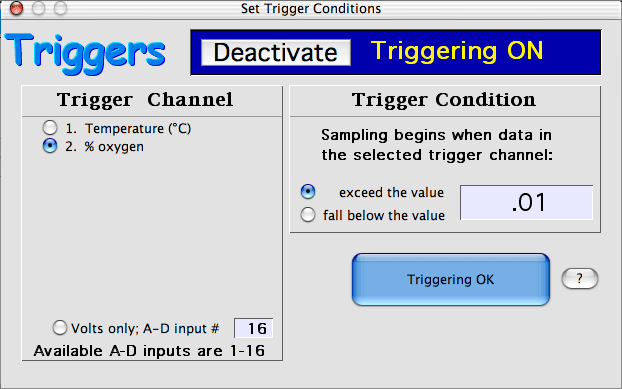
The 'TRIGGERS' button in the Display
Setup window (or the A-D menu) opens a window for setting options
for automatic triggering of recording. This allows the program to
wait until some condition is met before it starts sampling data. The
'trigger' is a value for one of the channels; data in that channel must
meet the user-set trigger condition -- either exceed or fall below the trigger
value -- before LabHelper begins sampling.

The trigger window allows you to:
- turn triggering on or off
- select the channel to be scanned for the trigger value. This
can be one of the regular data channels or -- if the number of regular
channels is less than 16 -- it can be an unassigned A-D hardware input.
- set the triggering mode (whether data must exceed or fall below the
trigger value)
- select the trigger value itself. Note that for regular chart
channels the trigger value is converted into the normal units for that
channel -- it is NOT the raw input voltage. For oscilloscope channels,
or if you are triggering directly from an A-D hardware input, the trigger
value is read as a raw input voltage only.
When all of these options are correctly set, click the 'Triggering
OK' button.
When sampling is started (or restarted), the program draws the normal
channel display on the screen. It displays the triggering conditions
at the top of the screen, along with a continuously updated readout of the
current value of the trigger channel (in Chart mode; in Oscilloscope mode
there is no trigger channel readout). As soon as the trigger condition
is met, normal sampling begins.
Note that you can interrupt trigger scanning and manually initiate sampling
from the keyboard. Hitting the spacebar, the 'return' key, or clicking
the mouse (or the button) will immediately initiate normal data collection.
Hitting the 'esc' key will stop scanning and open the OPTIONS
window.
- If the autorepeat option is selected in Chart mode, triggering is operative
for the FIRST data file only. For subsequent files, triggering is
switched off.
- The same applies in continuous Oscilloscope mode -- once the scope
channel is triggered, it runs continuously
- In discontinuous Oscilloscope mode (i.e., at very high sampling rates)
or in Multichannel Oscilloscope mode, triggering is operative for each
screenfull of data. Clicking the mouse or hitting the space bar (or
receiving a trigger value) will start the sampling and display another
screenfull of data. Alternately, hitting the 'return' key will temporarily
switch off triggering.
If the trigger condition is constantly met, the computer will continually
restart sampling, leaving little time to check the keyboard. To insure
a response to the 'tab' or 'escape' key, hold the
keys down until the computer does what you want.