| |
Starting acquisition after launching LabHelper |
|
When launched, LabHelper displays a splash-screen, like the example below.
Several things can happen once the splash-screen appears. If you have enabled automatic A-D converter connection, the splash-screen will time out after a few seconds and the program will attempt to connect to the default A-D converter. If you want to override automatic connection, hit the 'option' key while the flies are buzzing. See below for responses to errors in connection attempts.
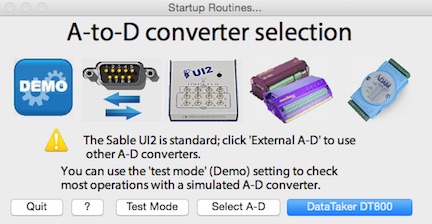
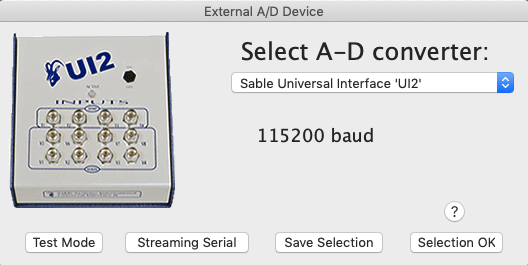
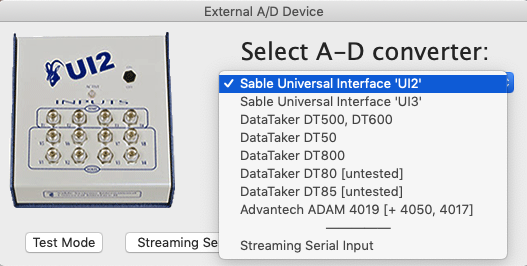
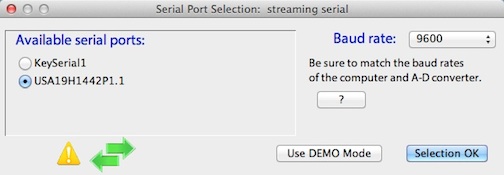
If you have not enabled automatic A-D converter connection and you didn't launch via a setup file, the splash-screen will time out after a few seconds. Then you will be asked to select an A-D converter (below). You can go bypass the time-out interval by clicking on the splash-screen window. The 'test mode' option lets you run the program with a simulated A-D device. Note the rightmost button, here 'DataTaker DT800', which shows either the default Sable UI2, or the last A-D converter you used (see below). If you click this button or the 'Test Mode' button, the program will skip the next section. If you clicked the 'Select A-D' button, another window opens with a choice of converter hardware: The 'streaming serial' option is for reading serial (ASCII) output from an external device, instead of the analog voltages, resistances, etc. handled by A-D converters. Selecting streaming serial, either with the button or from the popup menu, skips over the channel selection window and -- after you have completed the serial streaming selections -- takes you directly to the display setup window. If you want to use an external A-D converter (generally faster and more versatile than serial streaming), select it from the popup menu: Once you have selected an A-D converter (in this example, a Sable Systems UI2), the 'Save Selection' button is activated. Clicking this will let you save your selection in the 'Labhelper prefs' file that is read at startup, and your selection will appear as the default A-D converter in the initial selection window (shown at the top of this page). After A-D converter selection, the program needs to identify the serial port to which the A-D converter is attached (this is bypassed if you used 'test mode'). Port selection can usually be done automatically if you select the 'Automatically Select Serial Port at Startup' option in the A-D interface pane of the Preferences window (LabHelper menu), and then click the 'Save Settings...' button (this won't take effect until the next time you launch the program).
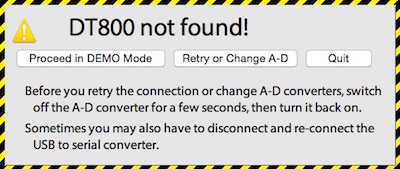
As the message says, if you want to retry connecting to the default converter, be sure to turn it off and then back on before trying to reconnect. This should clear any errors or garbled messages sent to the converter in the initial failed attempt. After the file root is selected, the program presents a window for entering a comment string (which can have up to 32,000 characters) and data for gas exchange calculations (body mass, air flow rate, barometric pressure, etc.). Edit these as necessary (they usually can be ignored for oscilloscope data), then click the 'Selection OK' button.
|
| go to: |